Tie 3 strings to the outer metal ring and tie them in a knot a 1/2 yard above the ring to make a hanging arrangement....
DIY CRAFTS
Supplies
Directions
1- Sketch your own house with doors and windows.
2- Fold two rather heavy sheets of paper down the middle. Cut out the outline and windows with a craft knife.
3- Place the two sheets of paper on top of each other, and sew a few stitches in two or three places along the fold. Make a floor from a third piece of paper if you want.
4- Ready for move in!
Supplies
Directions
1- Measure out how long and wide you want your wall hanging and cut the wallpaper to size.
2- Cut the wooden molding to size. You need 4 lengths and they should be 10” wider that the wallpaper or fabric. Hot glue 2 moldings on each of the wallpaper.
3- Tie a rope to the top ends of the moldings and the knot at the top.
Supplies
Directions
1- Punch a bunch of paper dots with a paper puncher.
2- Sew dots together into a very long garland, leaving some space in between each dot.
3- Connect 2 different sizes of metal rings by tying string between them at 3 places.
4- Tie 3 strings to the outer metal ring and tie them in a knot a 1/2 yard above the ring to make a hanging arrangement.
5- Cut your garland into shorter pieces and hang over both metal rings. Make the inner end a little longer and the outer a little shorter.
6- Secure garlands to the metal rings with a little bit of hot glue. This will make your mobile more stable.
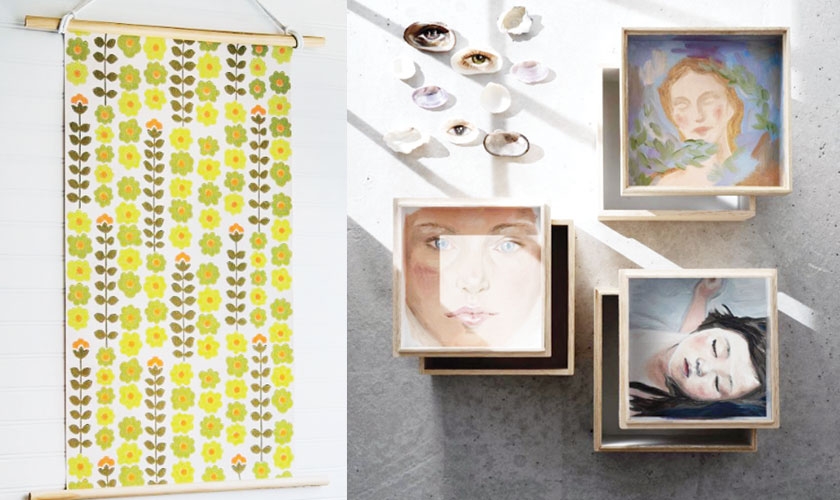
Supplies
Directions
1- Put masking tape around the edge of the lid to avoid getting paint on the outside of the box.
2- Paint the inside of the box lid and shells with a base layer of white acrylic paint. Allow to dry per package instructions of medium you’re using.
3- Create your work of art inside the lid of the box using oils or acrylics (I used oils).
4- Allow paint to dry overnight for acrylics and at least 72 hours for oils.
5- The receiver of the gift box can decide whether to keep the painting a hidden treasure or put it up for display. When left open, the rim of the lid frames the painting nicely!