Next, add the first piece of fabric on top of the mod podge. Be sure to put the fabric good side down for this particular fabric piece...
ARTSY CRAFTS
Material:
Instructions:

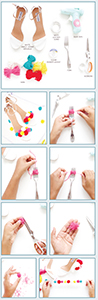
1- Create mini pom poms: wrap the yarn around the fork; tightly tie a piece of yarn around the middle portion of the yarn, using the fork tines as a guide; remove the yarn from the fork then use scissors to cut the looped ends apart; use the scissors to shape the pom pom into a perfect little ball
2- Assemble DIY pom pom sandals: Thread the clear monofilament onto a needle; string all the pom poms onto the monofilament; tie the monofilament around the front strap of the sandal and then begin wrapping the pom pom string around the front of the sandal; continue wrapping and then tie off the monofilament to secure it.
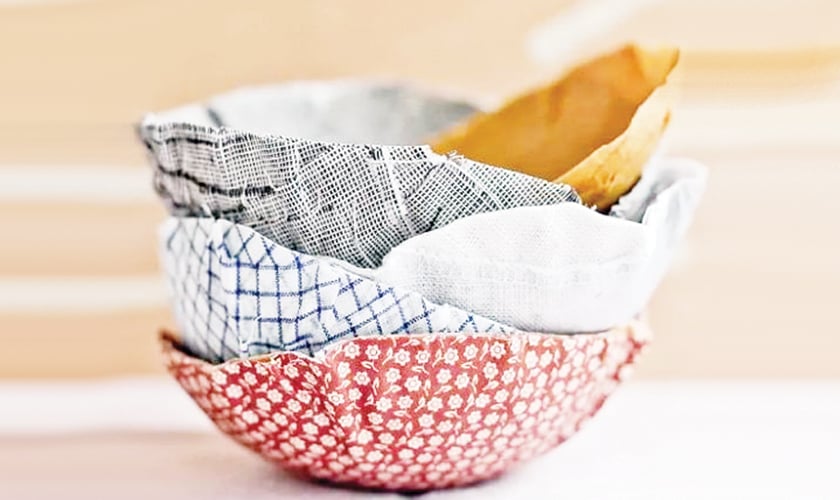
Fabric bowls
Material:
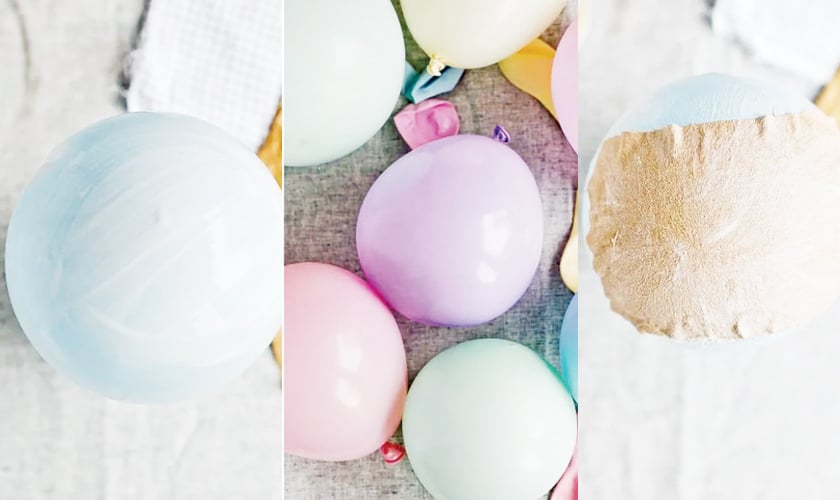
Instructions:
1- Blow up balloons. Collect fabric scraps and cut them down to rectangles and squares somewhere between 3 to 6 inches.
2- Rest a balloon in a cup or container so it doesn’t roll around. And add a layer of mod podge with a paint brush to the balloon.
3- Next, add the first piece of fabric on top of the mod podge. Be sure to put the fabric good side down for this particular fabric piece.
4- Add a pretty thick layer of mod podge on top of the first piece of fabric. Then use the paint brush to further smooth out any areas of the fabric that might need it.
5- Then add a second piece of fabric on top of the first. This isn’t required, but it will give your bowl a larger/ wider circumference if you do it this way. So you’ll be left with a bigger bowl than you would otherwise.
6- Add another layer of mod podge on top of this new layer of fabric.
7- Keep adding layers of fabric and layers of mod podge until you’ve reached a thickness that you like. Do at least four layers of fabric. For a sturdier bowl, 12-15 layers of fabric would be great.
8- Wait for the bowls to harden completely.
9- Once your fabric bowl is completely dry and has hardened, flip it over and pop the balloon with a pair of scissors. Remove the balloon gently from the bowl.
10- Then, using a shape pair of scissors, cut the jagged edges off to form more of a bowl shape.