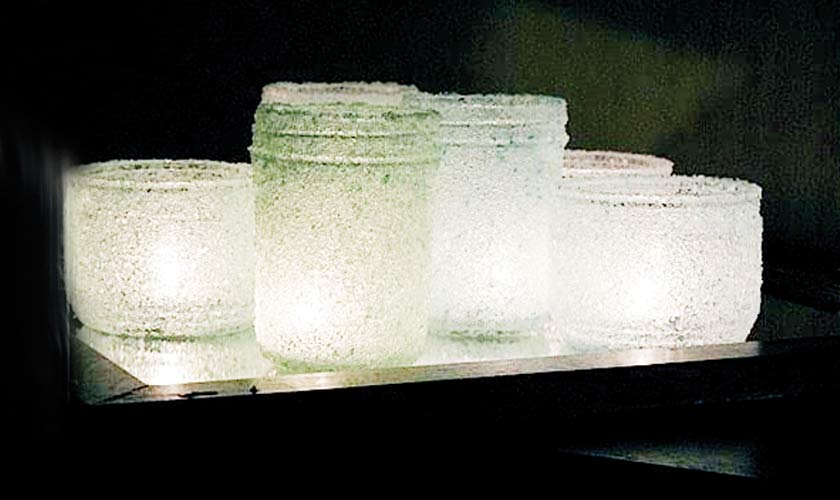
Put the white epsom salt onto a paper plate and gently shake back and forth to get an even layer. Place your hand inside the jar....
DIY CRAFTS
Supplies
Empty jars
Epsom salt
Blue and green food coloring
Paper plates
3 bowls
Mod podge
Clear gloss sealer
Instructions
Put about one cup of Epsom salt into each bowl. Add one drop of blue food coloring to one of the bowls and mix until evenly distributed. Add one drop of green food coloring to another bowl and mix.
Put the white epsom salt onto a paper plate and gently shake back and forth to get an even layer. Place your hand inside the jar.
Use a paintbrush to coat the jar generously in Mod Podge. You want to use a generous amount, but not so much that it’s dripping off the jar. First paint around the bottom rim of the jar, then the body of the jar, then the top rim.
Starting at the bottom rim of the jar, roll in the epsom salt. Next roll the body of the jar and the top rim.
Stand the jar up onto a separate paper plate and add some Mod Podge to the top lip of the jar. Sprinkle some epsom salt onto the lip.
Repeat this process for each color. Allow each jar to dry for a few hours. Use a clean paintbrush to loosen and remove any salt that fell inside the jars and to gently knock off any excess on the outside of the jars.
Spray with a clear gloss sealer. Let dry for about 20 minutes, repeat for a total of 3 coats.
Supplies
Mugs
Nail polish
Toothpicks
Instructions
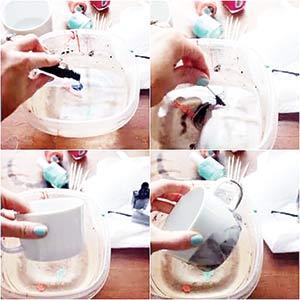
Fill the container halfway with hot water (hotter is better). Once the nail polish touches the water, it will start to set, and the heat will slow the process.
With the nail polish bottle very close to the surface, pour a drop or two of polish into the water.
Quickly use your toothpick to swirl the polish around.
Dip the mug into the water. The setting process is quick once the polish touches the water, so you’ll want to move quickly.
Place the mug on a paper towel to dry, top down.
Supplies
Plastic toy animal
White glue thinned down with water)
Wax paper
Pages from an old book, cut into strips
Twine or ribbon (for hanging)
Straight pins
Glue gun and glue
Black paint or permanant marker
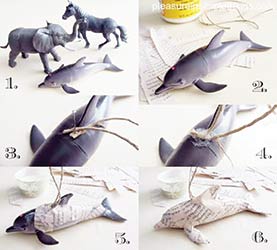
Sparkles (optional)
Instructions
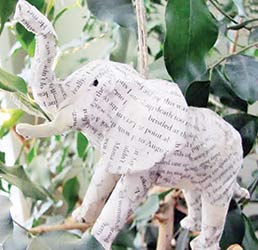
1. Decide what animal you will be working on. The more complicated the shape of the animal, the longer it will take because you will be covering the body with the strips.
- Apply white glue on the sides of a strip of the book page and attach it to the animal. Continue attaching pieces in random directions until the entire animal is covered.
- When the animal is completely covered, let it dry thoroughly.
-Compiled by SG