This article is only for lipstick lovers and people who love to perform experiments!
TIPS ‘N’ TRICKS
This article is only for lipstick lovers and people who love to perform experiments! There are so many fun things you can do with your lip colours - some very useful; others, just a waste of time and resource (but fun, nonetheless)!
Let’s begin!
Depoting
This was the first experiment I performed with my lipsticks. In depoting, you melt your lipstick into a container. Any small container will do.
This is useful if you carry a lot of lipsticks with you when you travel and want to save up space.
Procedure
1. Put your lipstick in a freezer for 15 minutes. Then take it out and pull it directly out of its tube and let it warm up a bit, for 5 minutes. Alternatively, you can directly cut off your lipstick from its tube and scrape out the lipstick that’s left at the bottom of the tube (but this is messy).
2. Put your lipstick on a spoon and heat it by placing it above a flame (But not in the flame. The lipstick may ignite). When your lipstick melts, mix it with a toothpick. I recommend putting some Vaseline into your lipstick during this step, because I’ve noticed a change of consistency - the lipstick becomes comparatively drier, although there is no change in color, odour, or any other property.
3. Pour your lipstick into a small container and let it cool. Once it cools down, apply it with a brush, or your finger tips, and wallah!
Remember
- Don’t use a candle to heat your lipstick. Candle flames make your spoon and lipstick black. It also gives off a burnt odour. Use a blue flame (the Sui Gas flame). Spirit flames also work.
- Don’t overheat your lipstick. Once half of it melts, the rest will melt when you mix it.
- You can depot your lipsticks into an empty eyeshadow palette to get a whole gradient of colors.
- You can cut off the tips of a few lipsticks and mix them together to get a new colour.
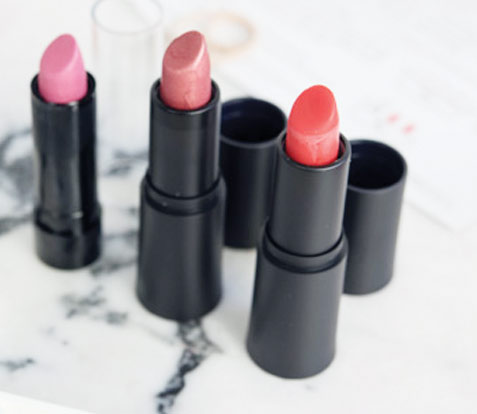
Moulding
This is the reverse of the above. You melt your lipstick into a lipstick mould to get a brand new (but old) lipstick!
After I was done depoting a series of my lipsticks, I realized that I liked my lipsticks better in a tube.
I made a few lipbalms in a container (a lot of Vaseline + some pink lipstick), but as far as the lipsticks were concerned, I liked watching the red decrease in length as it was used up. It was oddly satisfying.
So I went online and bought a Silicone lipstick mould and converted all my depoted lipsticks back into tubes!
For this procedure, you will need a mould and an empty lipstick tube. If you try to pour molten lipstick directly into a lipstick tube, the lipstick will leak from the bottom of the tube, into the lower part of the lipstick’s packaging. If you manage to seal the leaks and pour the lipstick directly into the tube, the solid lipstick will rub against the walls of the tube, and be hard to roll up and down, apart from having an ugly appearance. So, you will need a mould for this procedure.
Procedure
1. Melt lipstick/lipsticks in a spoon and pour it into a mould. Fill the mould to the brim; otherwise the lipstick will have trouble attaching to the empty tube.
2. Let the mould bench cool for five minutes, then put it in the freezer for 15 minutes.
3. Take the mould out, and plop the lipstick into the tube, and pull the mould off according to the instructions given by the manufacturer of the mould. Walla!
You can mix colours to get a new colour. Just don’t forget to add a small amount of Vaseline.
The blush
This is something you have probably heard of. Light colored cream lipsticks can be applied to your cheeks to be used as a blush. If you’re going somewhere and running low on space, all you need is a good, soft lipstick! It will serve as your lip colour, blush, and even your eyeshadow!
Concealer
I would do some crazy stuff with my lipsticks. I was gifted a beautiful, red matt lipstick. My sister asked me, “Have you used this?”
“Yes!” I replied.
“When?”
“Last month! I used it under my eyes to hide my dark circles.”
My dark circles are very deep and make me look bad. Very few products are capable of hiding my dark circles. I’ve bought a Kryolan TV stick just for this purpose, and my makeup is absolutely incomplete without that paint stick. And that paint stick needs a cover of contouring powder to work! It’s a hectic routine.
The red lipstick changes all that. Just put some red lipstick, some normal foundation on top of it, and you are good to go!
Just remember to use a matt lipstick, not a glossy or creamy one.
The balm
It’s basically the same as lipstick depoting, but you put a lot of Vaseline, and a little bit of lip colour to get the tinge of your choice. Mixing lipstick and Vaseline isn’t easy and you might have to mix for a very long time to get a fine consistency. Some people heat the two to make mixing easier. It’s up to you.
Gradients
If you have two similar lip colours, you can apply them together to get a gradient effect. The darker colour is applied to the inner side of your lips, and the lighter colour is applied on the outer side, nearer to the vermillion border. Then start dabbing your lips till you get a nice blend at the junction of the two lip colours!
You’ll probably need big lips for this to become noticeable. If your lips are thin, you’ll have to go for a lot darker shade on the inner side of your mouth. Just apply it as a thin line that becomes noticeable when your lips are closed.
When I first tried this, I looked really good. I went to my mom for an opinion, “Hey mom, how do I look?”
My mom said, “It looks like you applied lipstick, then ate something, and got your lipstick partly removed.”
So yes, you might look like that initially, but you’ll eventually get the hang of it. It looks excellent when done correctly!
Using empty tubes for storage
If you have empty lipstick tubes, there’s a great way to reuse them. Clean them thoroughly with a makeup cleaner. Then fill the clean tubes with small stuff like Bobby Pins, Hijab Pins, Breath Mints, Toothpicks, inside a fully lowered lipstick tube.
They will help you carry important stuff while you travel, stuff that is likely to fall to the bottom of your purse.