Cover the outside of your bowl with cling film, making sure the ends of the film wrap over into the inside of the bowl....
DIY CRAFTS
Supplies:
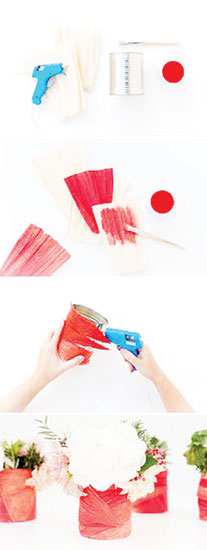
Paint corn husks with acrylic paint. Then, let the husks dry on a flat surface.
While paint is drying, remove labels from recycled cans and wash thoroughly. Then, dry the cans.
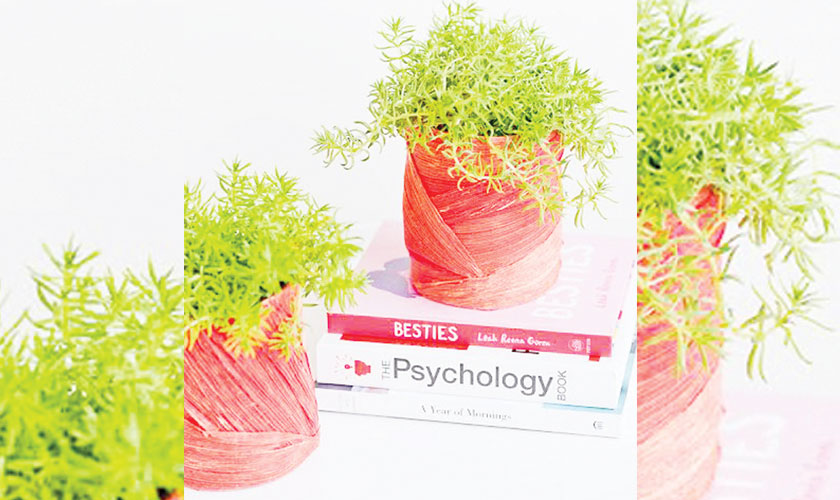
Once the husks are dry and the labels have been removed, glue the first layer of corn husks to the can. Completely cover the can with one layer of corn husks. Then, add a second layer of corn husks that are more intentionally placed, to add an element of design.
Once the husks are on, all you need to do is add some soil and a plant or use them as vases and add fresh flowers.
Instructions:
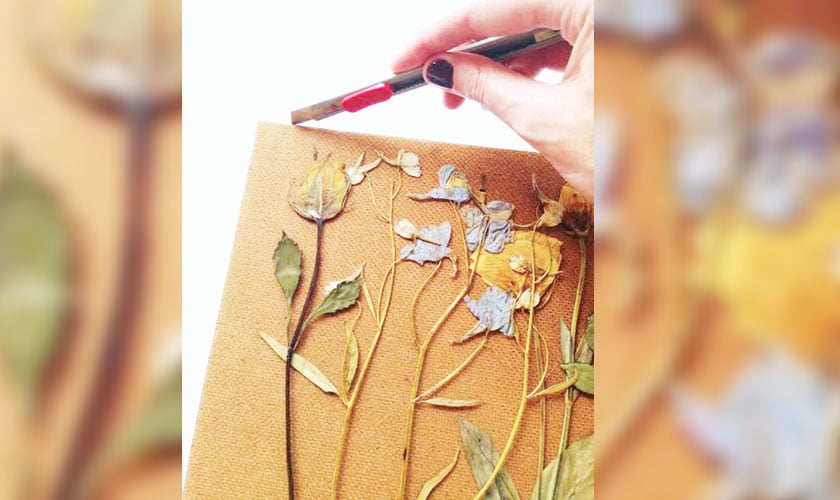
1. Collect a few samples of healthy flowers and dry them. Also select books accordingly.
2. Cut two squares of newspaper the size of the book you are pressing and lay one piece down inside the book. The newspaper will help absorb the moisture plus protect your book pages. Lay your flower onto the newspaper and try to arrange the leaves and petals nicely. Sandwich the flower with another piece of newspaper. This can be repeated throughout the book leaving a divide of pages between each pressing.
3. Leave the book closed in a stack of other books to provide pressing weight for about a month. After around 3-4 weeks carefully open your book.
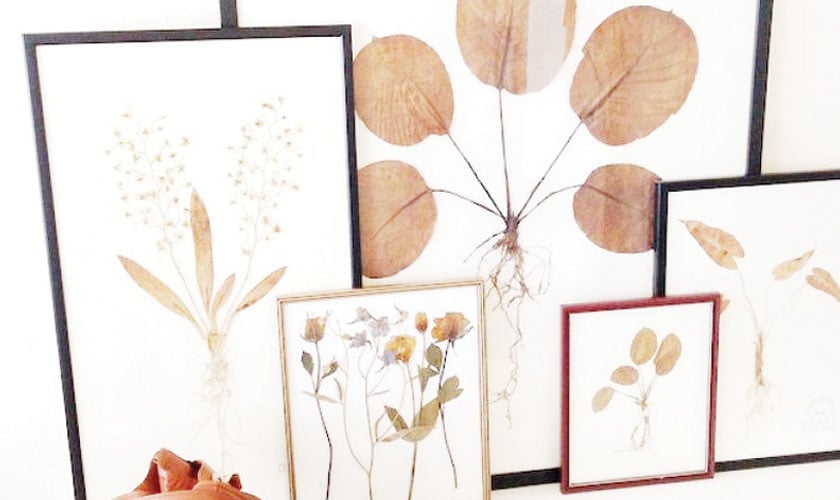
4.Take the base of your vintage frame and lay it onto your card and cut around the edge. Once the card is cut to size, place your pressings on top and when you are happy with the layout use the paintbrush to apply glue gently to the back of the pressed flowers and stick down.
5. Once the glue has dried replace the back of the frame and voila!
Instructions:
Paint corn husks with acrylic paint. Then, let the husks dry on a flat surface.
While paint is drying, remove labels from recycled cans and wash thoroughly. Then, dry the cans.
Once the husks are dry and the labels have been removed, glue the first layer of corn husks to the can. Completely cover the can with one layer of corn husks. Then, add a second layer of corn husks that are more intentionally placed, to add an element of design.
Once the husks are on, all you need to do is add some soil and a plant or use them as vases and add fresh flowers.
Supplies:
Supplies:
Instructions:
Free hand all the letters using a ruler and the width of the level to mark them all. If you don’t feel comfortable with that, you could print out letters from the computer and tape them up to the wall.
Then nail the nails in the corners and around the curves of each letter.
Now, tie the yarn to one of the nails and then just start wrapping. You could write anything you want.
String bowl
Supplies:
Instructions:
Cover the outside of your bowl with cling film, making sure the ends of the film wrap over into the inside of the bowl.
Pour some fabric stiffener into the other bowl.
Cut 12 lengths of string measuring about 110cm (42 in) each.
Wind the lengths of string around your fingers to form a neat roll. Place the string in the bowl with the fabric stiffener. Push the string down into the fabric stiffener and pour more over the top so the string is covered. Knead the fabric stiffener into the string so it’s completely soaked through.
Start wrapping the string randomly around the bowl. For this bowl I wrapped the string over the bowl from one side to the other, rather than around and around. When the string reaches the rim just turn back creating a ‘U’ turn. Keep adding new pieces of string, making sure the ends of each piece are towards the base of the bowl.
Use eight or nine pieces of string and the bowl should be pretty well covered.
Wrap the remaining three or four pieces of string over the rest, going around and around the bowl in a spiral.
Put the bowl aside to dry - place it outside in the sun if you can. Otherwise, an airy spot in your home near a window will do the job.
As the bowl starts to dry, press over the entire mould with your fingers and palms periodically. Start doing this when the string has dried out enough so that you don’t get fabric stiffener all over your hands when you press on it. As the string dries out you can press harder and the form will become consolidated and strong.
When the string feels dry, remove the bowl and the cling film. Your string bowl might feel a bit pliable, but it will continue to dry over the next day or so. Make sure you allow it to dry completely before putting anything in it.